

How to edit underwater photos. 6 easy ways to improve your scuba photos.
Have you ever felt disappointed after reviewing photos from your dive? Marine life that looked vibrant underwater suddenly looks dull, faded, green, or blue. Don’t delete those pictures just yet! Underwater photography isn't as straightforward as above-water photography. Luckily, there are many easy ways to improve your underwater photos.
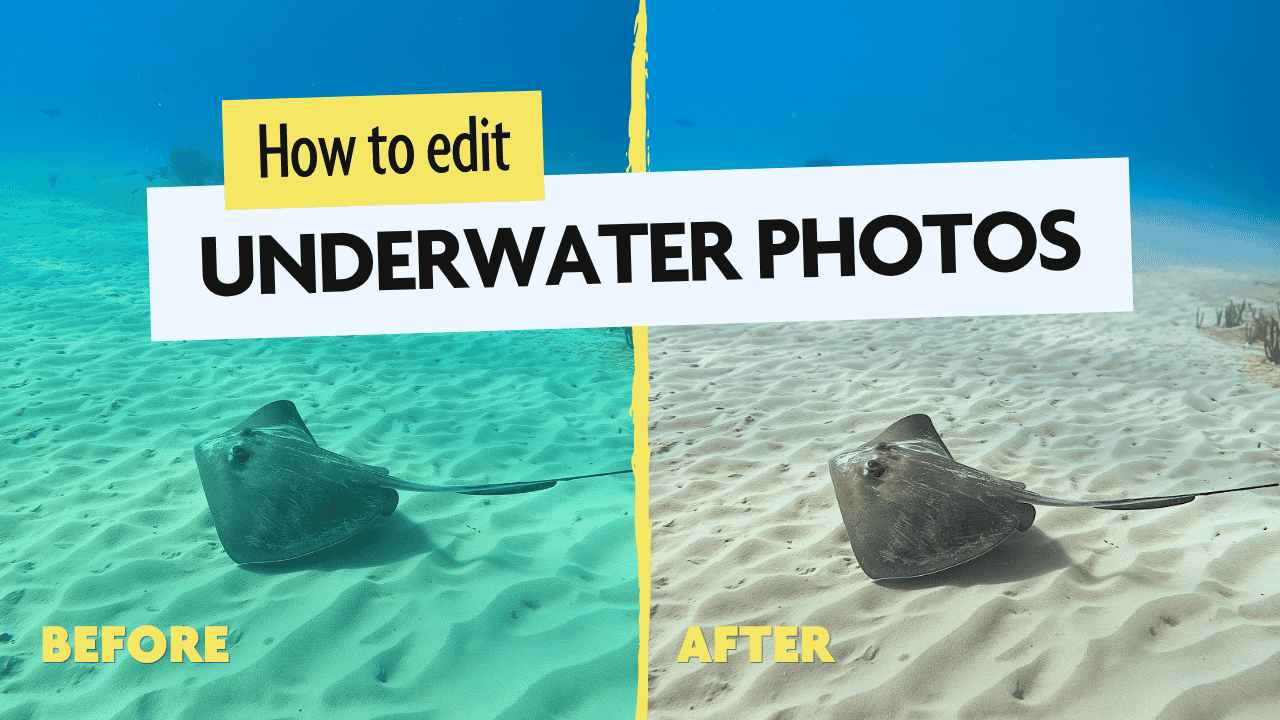
First things first. It’s important to distinguish between what you can do to improve underwater photos before and after your dive. Better equipment naturally yields better photos. That said, this guide will focus on photography basics and photo editing. In other words, we’ll cover ways to improve your underwater photos after you take them.
Why? Because upgrading your underwater photo equipment is a big financial commitment. A professional-grade camera, waterproof housing, underwater lights, and other accessories could cost hundreds, if not thousands, of dollars.
If underwater photography is just a casual hobby or a way to preserve your scuba diving memories, it may not make sense for you to spend a lot of money on new equipment. Perhaps you’re simply looking to make the most of photos taken on a cellphone in a waterproof case, a GoPro, an Insta360, or another portable underwater camera.
Learning about the basics of underwater photography and how to edit underwater photos can make a dramatic difference. With a few simple adjustments, you can restore lost color, improve contrast, and reduce the hazy look of your photos.
Let’s cover some beginner-friendly ways to improve your underwater photos, plus a little on how to take better photos in the first place.
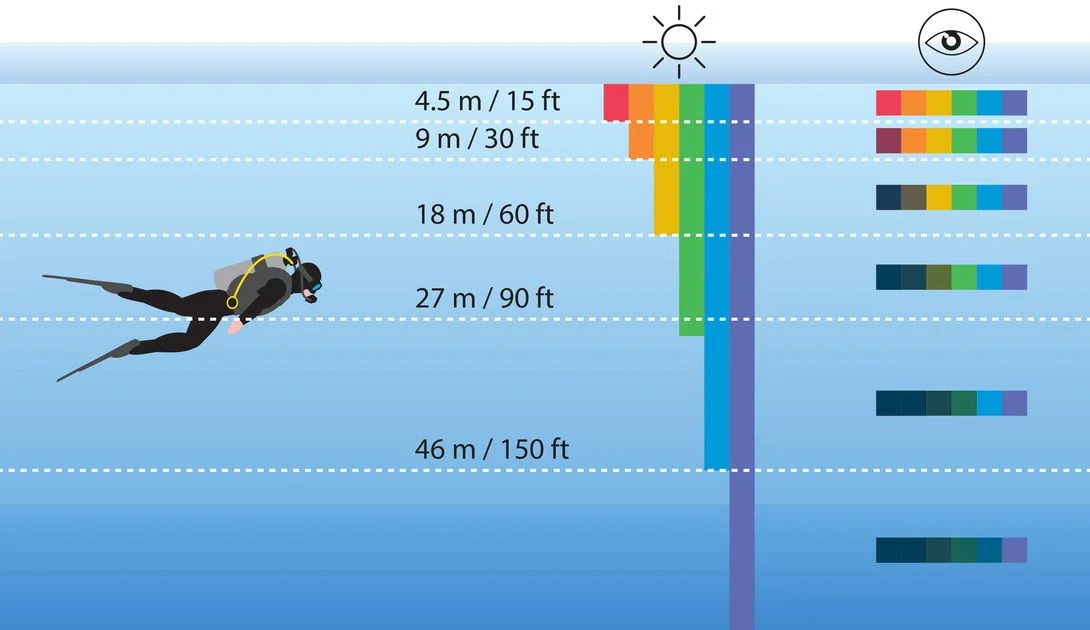
Perceived color loss while underwater, courtesy of Scuba Schools International.
Why do underwater photos lose color?
Before editing an underwater photo, it helps to understand why underwater photos look different than those taken at the surface.
Water absorbs light wavelengths in the order of the rainbow (ROYGBIV—Red, Orange, Yellow, Green, Blue, Indigo, Violet). As you go deeper underwater, you will notice this color loss more drastically.
Longer wavelengths, including red and warm colors, are absorbed relatively quickly. Blue wavelengths penetrate farther, which is one reason your underwater pictures can look overwhelmingly blue or green.
Why do my underwater photos look dark or blurry?
Like color loss, reduced underwater light can also make photos look unattractive. At the surface, your photography subjects may be lit naturally or artificially from many different directions. Underwater, illumination is scarce. This can lead to pictures that lack contrast and definition. Cloudiness can also show up in photos due to water quality or floating particles.
Note: Some of the links on this page are affiliate links. This supports us in our efforts to provide useful content.
How to prevent dull and dark photos underwater
As we mentioned earlier, upgrading your photography equipment can drastically improve your underwater photos, as more powerful cameras can capture higher-resolution images and perform better in low-light conditions. However, we will focus on easy, low-cost solutions. Here are a few quick ways to improve your underwater photos:
Be mindful of your position. Avoid a backlit subject. While you can’t control dive site conditions or cloudiness in the sky, try to work with the natural light rather than against it. Angle yourself so your subject is lit from the front.
Use a dive light to illuminate your subject. Diffusers, flashes, and underwater strobe lights can get expensive, but you can modestly improve your photos with small underwater lighting accessories. Just be mindful not to worsen visibility by reflecting light directly off suspended particles.
Use underwater camera filters. Underwater camera filter attachments are available for many brands and models. These filters add a red, violet, or pink tint to your camera, restoring warm colors underwater. Filters can save you from color correcting photos, but they may not work for all dive depths and lighting conditions. Learning how to edit photos gives you more flexibility and control.
Get to know your camera. Whether you’re using a phone, GoPro, Insta360, or something else, every camera has its own strengths, limitations, and settings. Look up videos and tutorials online to make sure your camera settings are optimized for underwater environments and that your footage is exported in high quality.
Now that we’ve covered a few easy ways to take better photos, let’s see how you can improve any photo after diving.
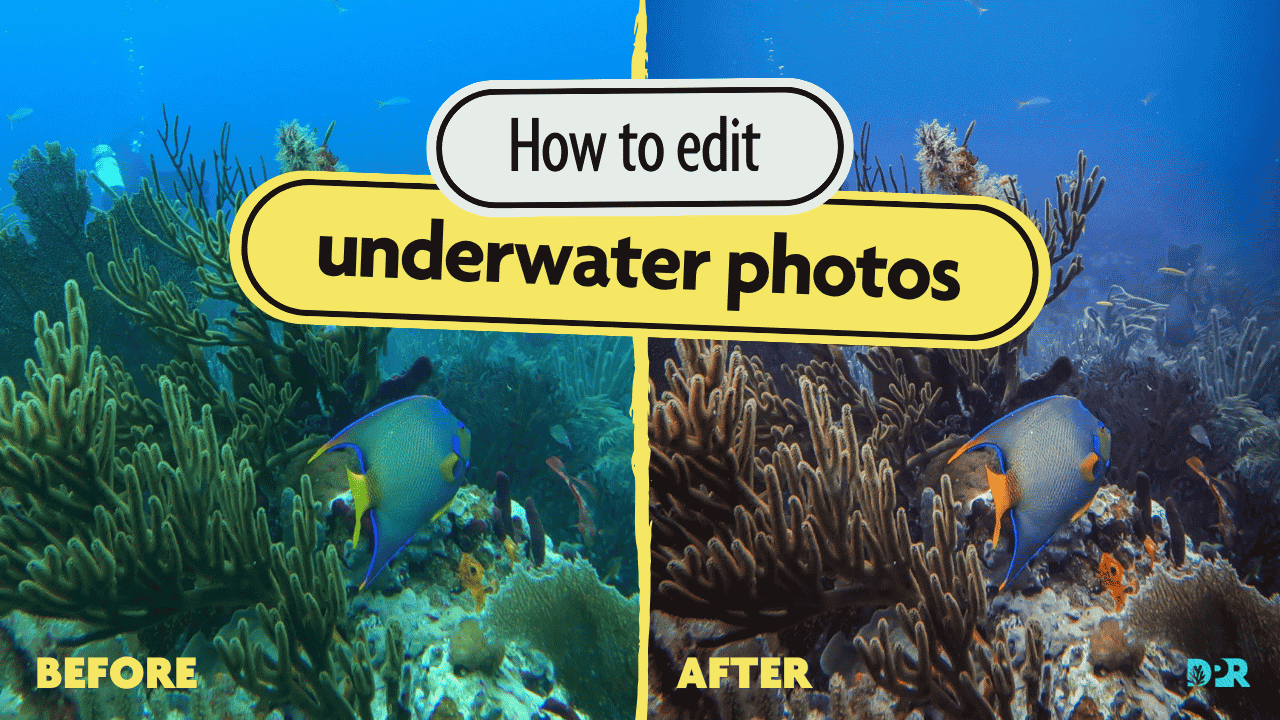
Where can I edit underwater photos?
You can use any standard photo editing software to edit your images. There are hundreds of photo editing apps, websites, and software available. You can edit photos on your phone by changing the brightness, temperature, sharpness, and other settings. This may be sufficient for underwater photos taken at shallow depths.
For more advanced editing, you may want to look into specialized apps like Canva, CapCut, Photoshop, Lightroom, Darktable, Affinity, DaVinci Resolve, and so on. Some are free, some are affordable, and some are quite expensive. If you intend to edit many photos, whether underwater or not, a photo/video editing app may be a worthwhile investment.
Aside from more powerful customization options, a specialized photo editing app allows you to use pre-made actions or filters designed specifically for underwater photos. This will save you a lot of time because you can edit multiple photos at once with a few clicks. (More about that later.)
How to edit and improve underwater photos
Let's look at how to edit and improve underwater photographs. We'll take a sample scuba diving photo and edit it step by step. To keep this beginner-friendly, we'll focus on small changes that can be made with free or low-cost apps.
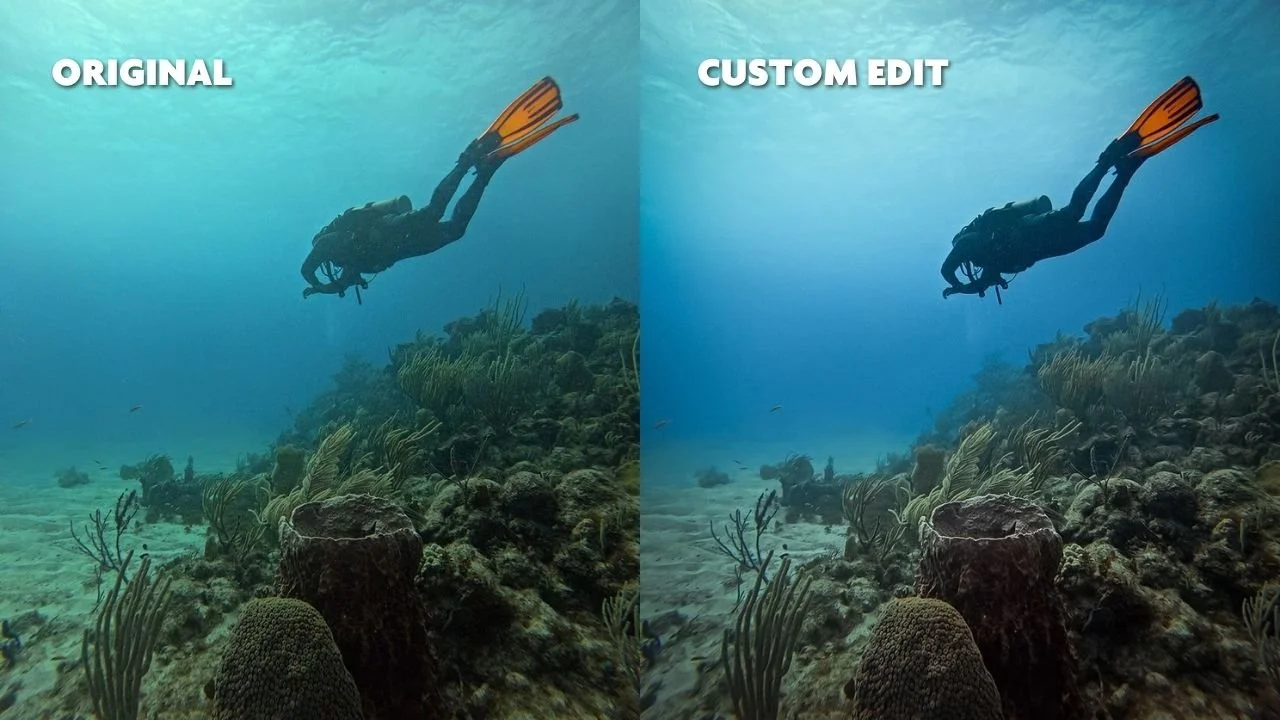
Small edits can be easily performed using free or mobile apps while still improving underwater photos.
1. Correct the white balance or temperature
White balance controls an image's overall color temperature. Underwater photos often have a strong blue or green cast, so warming the image can make it appear much more like what you expect.
When a photo's white balance is off, elements that should be white appear yellow, blue, green, or another color. Adjusting the white balance in a photo tells the software what white should look like.
It varies from photo to photo, but generally you want to restore warmth to underwater photos (yellow, orange, and red). Play around with these settings to see what works best for your particular image.
Tip: Some applications, such as Adobe Lightroom, offer automatic white balance correction. This may work sometimes, but it is typically not ideal for underwater photos. You will likely get a better result with manual adjustments. Look for options to modify the "Tint," "Hue," "Warmth," or "Temperature" of a photo.
2. Increase contrast and/or saturation
Underwater photos can look flat even when the colors are reasonably good. That's partly due to low lighting and because you're photographing through a large amount of water, which reduces the definition between your subject and the background.
Nowadays, even your built-in phone editing options allow you to change a photo’s contrast and saturation. To increase contrast (the difference between lights and shadows), look for settings like:
Contrast
Blacks
Whites
Shadows
Highlights
3. Reduce hazy blurriness
Another common problem with underwater photos is haze. Even clear-looking water contains particles that can scatter light. Those particles can make distant subjects look soft, hazy, or low contrast.
Plus, decreased natural lighting makes it harder for cameras to take a well-defined photo. In order to fix this, try adjusting settings such as “Dehaze,” “Clarity,” and “Sharpness.” These are also available in most smartphone built-in editing options.
Tip: Be careful with these adjustments! Too much can exaggerate backscatter and make photos appear very crunchy. Ideally, you want to strike a balance between sharpness and detail while also limiting noise. Underwater photographs, particularly those taken in silty water, without a flash, or with portable action cameras such as GoPros, are usually already noisy.
4. Remove distracting backscatter and particles
If you recently increased the sharpness of your photo, important details like people or marine life became more detailed. The disadvantage is that you might have also highlighted noise or particles.
Notice those little white dots scattered throughout your photo? Those may be particles in the water reflecting light toward your camera. This is commonly called backscatter, and it can be particularly noticeable when using artificial lighting.
You won't always be able to remove every particle, but you can clean up the most distracting ones during editing.
Depending on your photo editing tool, you may be able to remove them with a one-click action. Otherwise, you may have to erase the particles individually, one by one. Look for tools such as:
Healing
Remove
Spot Removal
Retouch
Tip: If don’t have access to apps with “healing” or “remove” tools, try apps aimed at beauty retouching. The Retouch or Blemish Tools, intended for facial acne, often work on underwater particles.
5. Make your subject stand out
We’re on to the finishing touches. Understanding photo composition will allow you to take better photos. However, composition and focal points can be improved during the editing process.
Sometimes it's as simple as cropping your image to remove distracting elements. In other cases, you can enhance your desired focal point by simply editing your subject, whether it's a diver, turtle, fish, or coral structure.
Depending on the app or software you're using, you may or may not be able to selectively edit specific areas of the photo. Selective edits are typically made in advanced photo editing programs using "layers" or "masks." These let you edit the subject and background separately.
If possible, make selective changes to your subject to:
Slightly increase exposure, brightness, or contrast on the subject.
Increase texture or clarity on the subject.
Increase color saturation selectively.
Darken the surrounding water or use vignetting.
Reduce distracting colors in the background.
6. Alternative: Use an underwater LUT or Preset
You may be thinking, "I have to do all that every time I want to edit an underwater photo?!" Hehe. 😉 Well, sort of. Photography is an art form, and photo editing can be quite time-consuming.
Fortunately, shortcuts exist! You may be familiar with pre-made options like filters, Lightroom Presets, and LUTs (Lookup Tables), which can be used in editing apps to quickly transform photos and videos with a single click or tap.
A pre-made action may be enough to significantly improve your photos or may be used as a starting point for further editing. Presets may already be available in your preferred app. Depending on the application, these may be called by different kinds of names.
In general, most built-in presets are geared toward surface photography and may not provide the corrections you seek for your underwater photos.
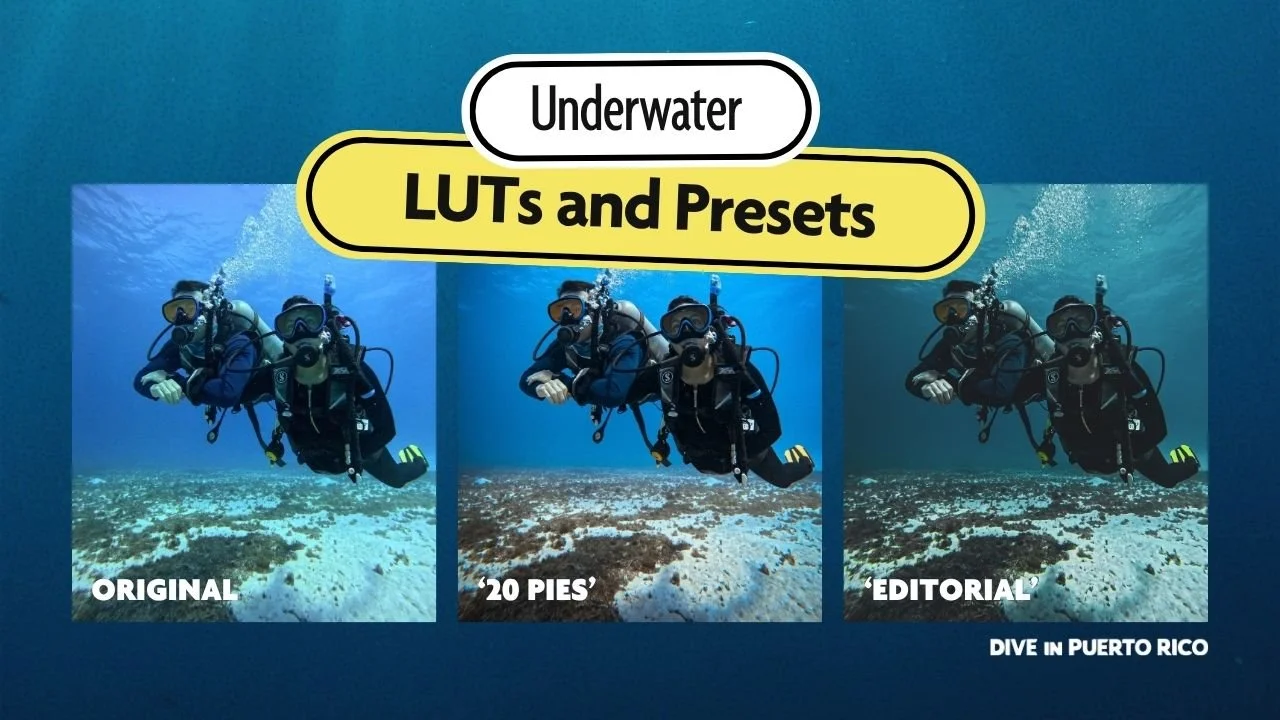
Dive in Puerto Rico Underwater LUTs and Lightroom Presets
We, too, became tired of making repetitive edits to our underwater photos, so we developed our own underwater photography presets and LUTs. These are available in .xmp and .cube file formats, allowing them to be used as Adobe Lightroom presets and in any photo/video editing software that supports LUTs.
Our Dive in Puerto Rico Underwater LUTs and Presets are versatile. They include 11 pre-made creative adjustments for various water depths and styles. You can use Dive in Puerto Rico Presets and LUTs to alter underwater photos and videos in Adobe Lightroom (desktop and mobile), Premiere Pro, After Effects, Final Cut Pro, CapCut (desktop), DaVinci Resolve, Affinity Photo, and more.
If you're an experienced photographer, you may be aware that there are other ways to use LUTs, such as loading them onto a memory card and using them directly on your camera, thereby skipping the step of post-production editing.
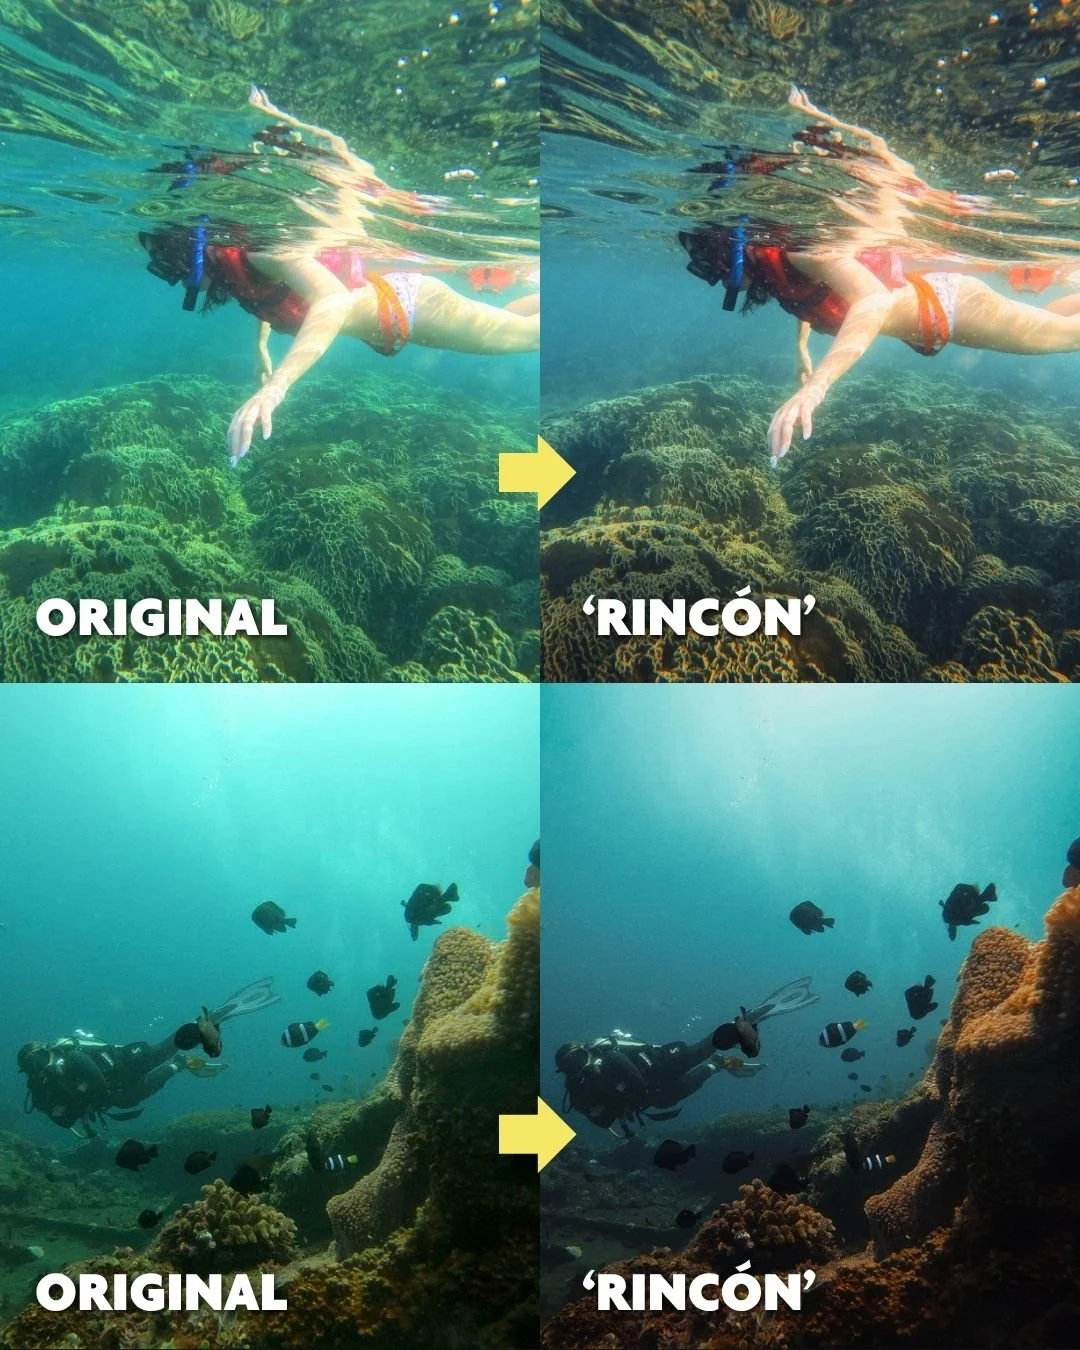
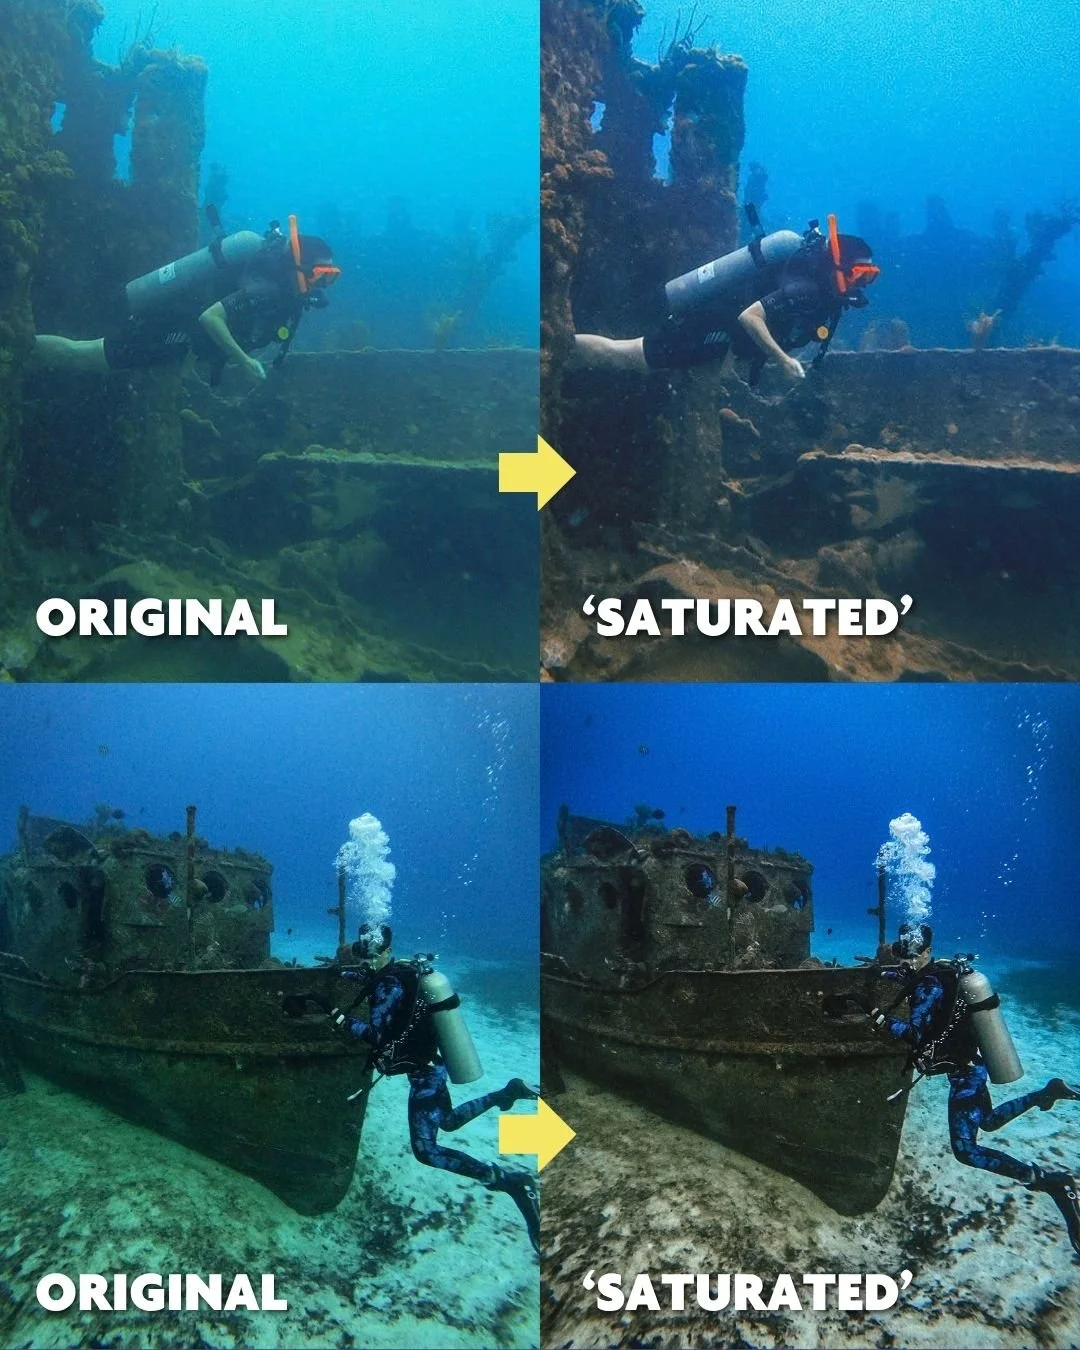
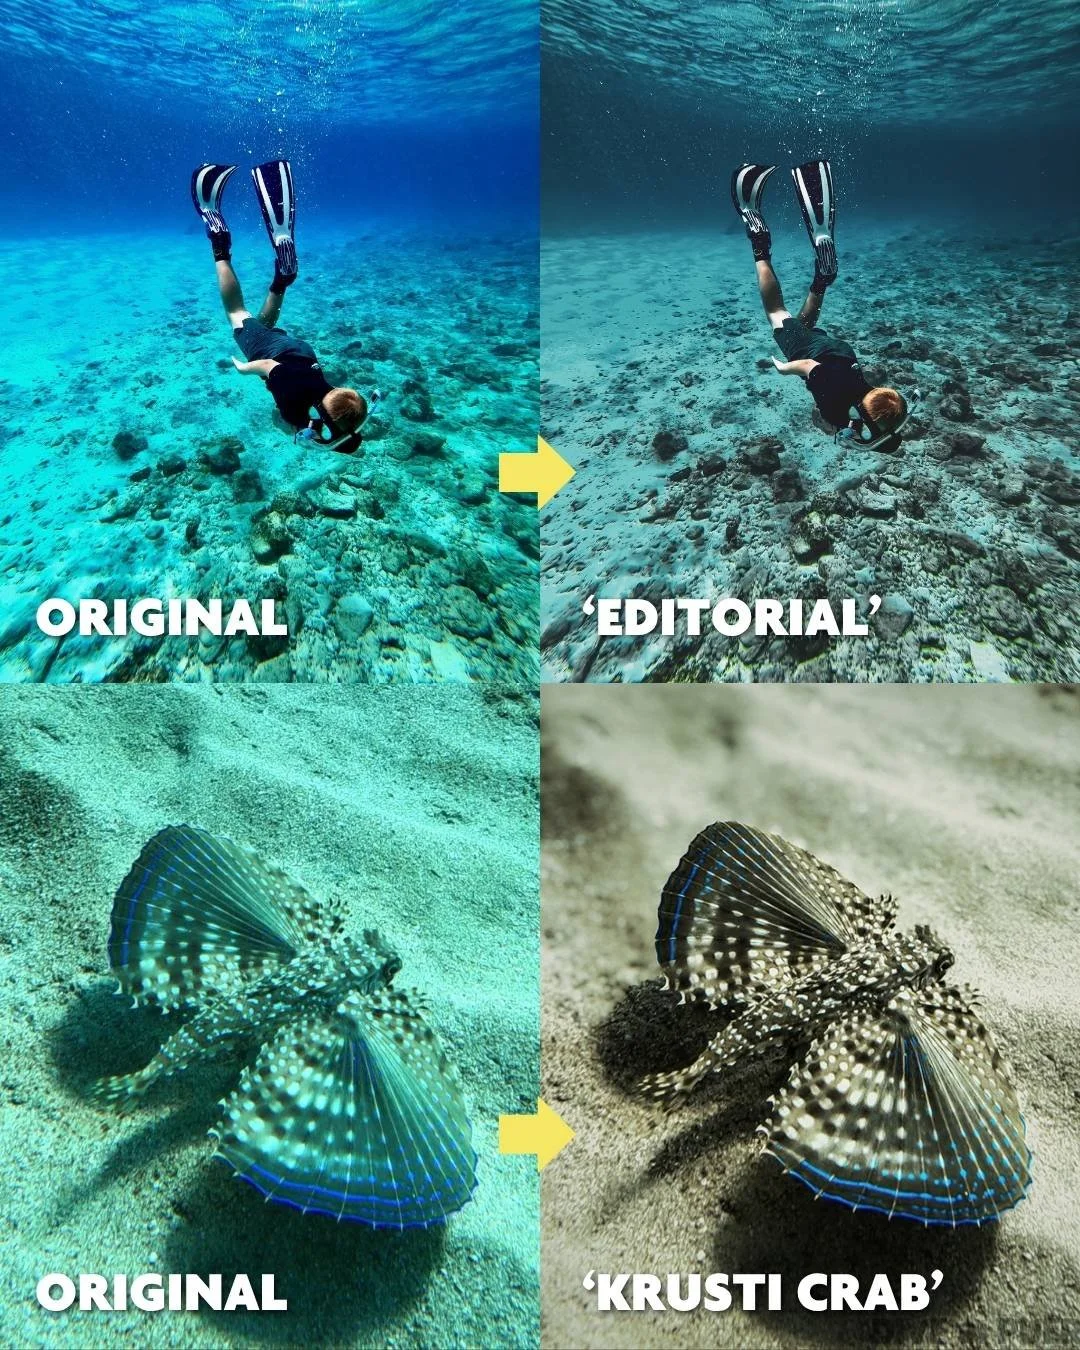
Below are examples of underwater photos edited with a single Dive in Puerto Rico underwater preset, and nothing else. We made a point to include photos taken with older GoPro models to demonstrate how you can improve any photo, regardless of the camera used.
Want to fix your underwater photos faster?
Instead of editing every image from scratch, use a preset to instantly improve your photos. Our underwater LUTs and Presets were created specifically for scuba diving photography.
You don't need the most expensive equipment to capture lasting memories. You can take fantastic underwater photos by becoming acquainted with your camera, utilizing lighting to your advantage, and considering the composition of the photograph. Once you're ready to edit them, remember the basics:
Adjust the white balance or temperature.
Increase contrast.
Reduce blurriness.
Remove distracting objects or particles.
Make your subject stand out.
(Optional) Apply an underwater LUT or Preset.
Of course, editing has limitations. If the photograph is severely underexposed, overexposed, or blurry, there is only so much you can do. Yet, many underwater photos that appear to be ruined right out of the camera are actually much more salvageable. We hope this inspires you to revisit some of the photos you had given up on. Have fun diving!
